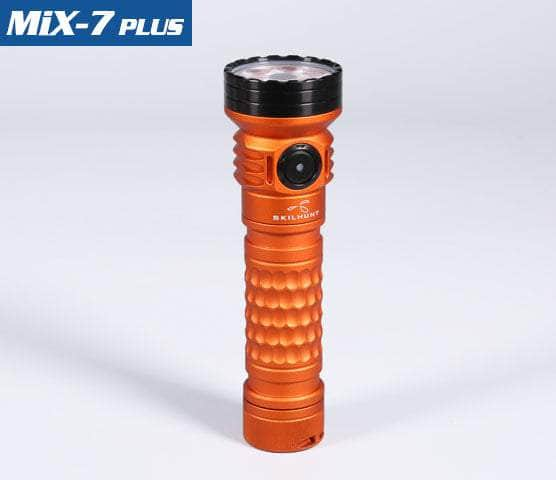
Skilhunt MiX-7 Gen 2 Plus


LED:
White LED: 3 x CREE XP-G4 5700K / 3 x Nichia 519A High CRI R9080 5000K
Max output: CREE Cool White ANSI 2000 Lumens, Nichia High CRI ANSI 1400 Lumens
Red light: ANSI 230 Lumens, Green light: ANSI 375 Lumens, Blue light: ANSI 55 Lumens
MiX color: Pink (ANSI 70 Lumens) –> Amber (ANSI 180 Lumens)–> Cyan (ANSI 250 Lumens)
UV 365 light: 1000 mw
Max runtime: 600 hours
Quiescent Current : 55 μA
Max beam distance:
White Light: 182m (XP-G4 CW) / 115m (NVSW519AT)
Color Light: 61m (R1) / 96m (G1) / 12m (B1)
Max peak beam intensity:
White Light: 8300cd (XP-G4 Cool White) / 3300cd (NVSW519AT)
Color Light: 950cd (R1) / 2300cd (G1) / 40cd (B1)
Waterproof: IPX-8
Impact resistant: 1 Meter
Battery: 1×18650
Rated Range: 2.7V ~ 4.2V
Dimension: L109.6mm / 4.31″, Head diameter 32.5mm / 1.28 “.
Weight: 68g / 2.40 oz (Excluded battery)
Accessories: Magnetic Charging Cable, Clip, Lanyard, Spare O-rings, User manual.
1,Battery installation & Replace magnet:
Please make sure that the positive pole of the battery points to the head of the flashlight when you replace the battery.
1. ON/OFF
Single click the side switch to turn the light on/off. When the light is turned off, it will memorized
current brightness level or mode.
2. CHANGE BRIGHTNESS LEVEL
When the flashlight was OFF status:
Single click switch to Main Group(H>M1>M2).
Quickly double clicks switch to Turbo Group(T1/T2).
Quickly triple-click switch to Strobe Group(S1>S2>S3>S4).
Hold press switch 0.5 second to Low Group(L1/L2).
Hold press switch 1 second to RGB Color Group (Low Level R4/G4/B4).
Hold press switch 2 second to UV Group (UV1/UV2/UV3).
Quickly click and hold switch to RGB Group or Mix Color Group.
When the flashlight was ON (Turbo Group, Main Group, Low/Color Group)
Press and hold the switch to automatically cycle, the level is selected when the side switch has
been released, turn off memorized.
When the flashlight was ON Main Group(H>M1>M2)
Quickly double clicks switch tranfer Main Group to Turbo Group, repeat quickly double
clicks switch back to Main Group.
Quickly triple clicks switch transfer Strobe Group.
Quickly click and hold switch tranfer Main Group to Low Group.
When the flashlight was ON RGB Color Group:
Press and hold the switch to transfer the brightness level; Quickly click and hold switch tranfer
Red-Green-Blue; Quickly double clicks switch tranfer RGB Color Group to Mix Color Group;
Quickly triple clicks switch transfer Color Strobe.
When the flashlight was ON Mix Color Group: Quickly click and hold switch tranfer 9 mixing
colors; Hold press switch tranfer Stepless mixing color.
Strobe Group/Color Strobe:Quickly double clicks switch tranfer Strobe mode, turn off memorized.
When the flashlight was ON UV Group: Hold press switch tranfer UV3-UV2-UV1.
When the flashlight was ON White Mode: Quickly click and hold switch tranfer to Color Mode.
3.LOCK-OUT FUNCTION & LOCATION INDICATOR
When the flashlight is off , quickly click switch 4 times to access the button lockout mode
(location indicator activation at same time,the indicator light flash every second.Double clicks can
turn on/off the indicator). Quickly click switch 4 times,the button unlock and activate Low mode.
4. LOW VOLTAGE INDICATOR
When the battery voltage drops below 3.0V, the indicator flashes twice every 2 seconds.
When the battery voltage drops below 2.7V, the light will turn off.
Power indicator
Every time turn on , the side indicator will be light 5 seconds to display the battery power.
Constant blue indicator: 100%~80% power
Blinks blue indicator: 80%~50% power
Constant red indicator: 50%~20% power
Blinks red indicator: 20%~0% power
Connect the magnetic charging cable to an external USB power source,
then attach the other end of the cable to the charging port of the light
(Recommeded USB power no less than 5W (5V 1A) )
The red indicator means charging, when the battery charging completed,
change to blue indicator.
!!! Rechargeable function only for one 18650 (3.6V / 3.7V) rechargeable lithium battery!
When the battery is incorrectly insert the light,chagring will damage the charging circuit.